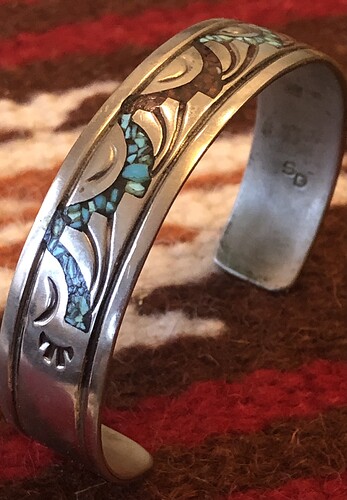
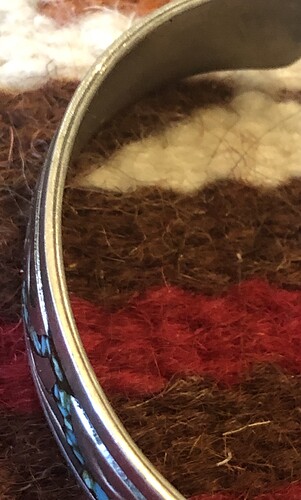
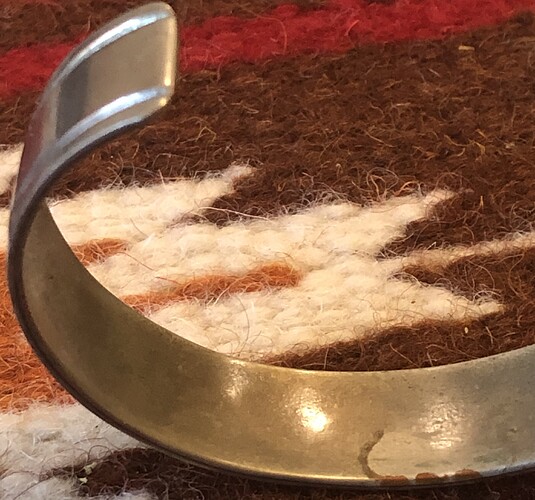
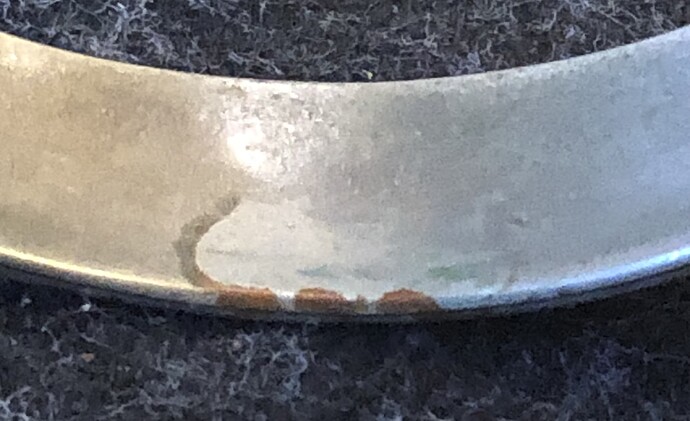
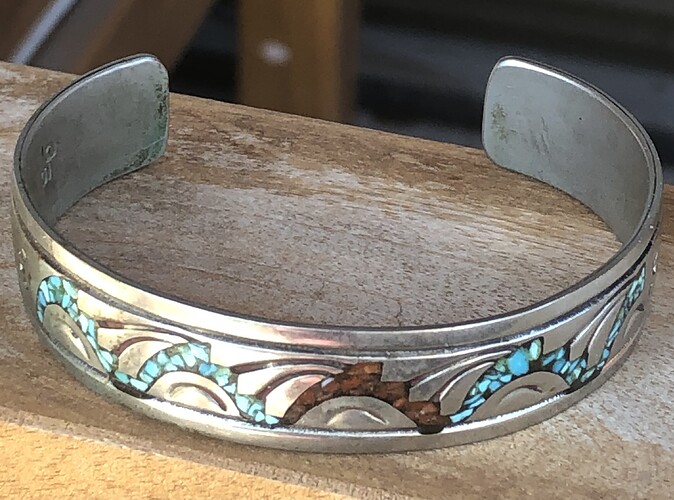
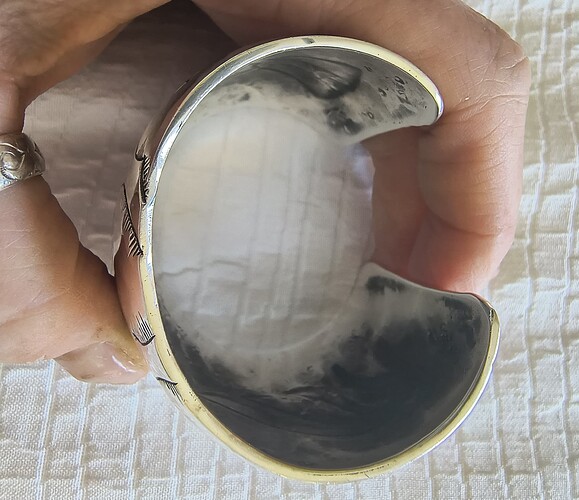
Hello. I had thought this William Singer cuff (marked SD) was sterling but upon inspecting it the inner surface has a yellowish, brassy look. Also some red color and hints of verdigris, to my eye. It looks like it may be sterling over brass? Also looking closely cuff seems to have two layers. I have had other Singer chip inlay cuffs but have not seen this. Cant see anything online suggesting the use of a sterling over brass technique. Any ideas? Has anyone seen this? Also, if it is sterling over brass would it be substantially less valuable than if all sterling? Hope photos show what I am talking about. It is a pretty piece. Thanks in advance for any ideas. Lin
Lamination would be normal if the design was first cut out then soldered to the solid underside. If coin silver was used there would be 10% copper (as opposed to 7.5% copper and sometimes other metal for sterling). Salt from your wrist could result in the formation of Verdi gras. The brown looks like stains. Non destructive XRF would verify metal content.
Thanks Steve. Very helpful.
The layering is the result of two sheets of metal with one cut out in a pattern for inlay and one as backing which are then soldered together to form the bracelet. The darker reddish patches are usually fire scale (cuprous oxide) left over from the soldering process, and not buffed away in the finishing process. Sterling is usually 7.5% copper, and when heated to high temps the copper content on the surface of the metal oxidizes and becomes visibly darker. Usually it’s buffed away in the finishing process, but it’s not uncommon to find a patch here and there on Native handmade jewelry.
The spots I see on your bracelet actually look to me as if your bracelet may be made of base metal and plated, with the plating having worn off in that area.
Base metal plated with sterling. I am wondering if the piece still has some value since it was made by William Singer and has a nice enough design. Any guesses at value?
Have you tried using a polishing cloth on the cuff? I have several silver cuffs that tend to get brassy looking when they sit for a while. Others by the same artist don’t. I would start there. You could also test the metal. Hope that fixes the problem.
No one has answered these two questions yet:
Did William Singer use plated metals?
Did he always stamp his work SD both with or without a crescent moon?
I did clean the metal though not thouroughly, and no tarnish seemed to come off. A bit of verdigris was wiped away, telling me there was possible copper or brass. To me it looks to be a layer of sterling over brass.
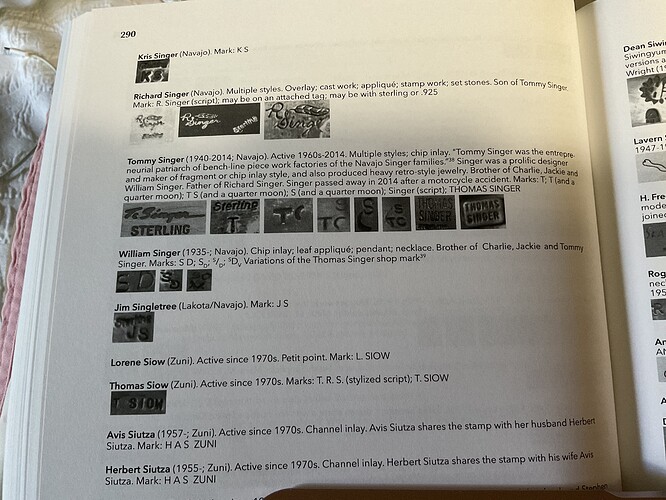
In Hougart’s book I saw the SD hallmark, one letter lower than the other, as on this piece, and dont recall seeing the crescent mark with this hallmark.
In Hougart’s 5th edition there are several different hallmarks listed and there may be more. In reference to the verdigris, I live in SC and the humidity will destroy sterling if you don’t pay attention. I have picked up older pieces of sterling that have verdigris. A prime example is a squash blossom that I bought from a neighbor. She is an artist and had had it hanging on a bust she made. I don’t know how many years it had been there but she took it down when they put their house on the market. When I acquired it it was black with verdigris starting in some areas. I spent a lot of time polishing…
I was curious about an “SD” hallmark for William Singer. This photo is from my Hougart’s 3rd edition NA/SW silver hallmarks book. (Not sure that this definitvely answers your 2nd question, though.)
My understanding re verdigris corrosion is that it is a greenish or green-blue color versus black.
I put together the fact that the Singer’s often made (make) coral and turquoise chip inlay pieces, along with the hallmark with the letters offset, to think it is William Singer’s work. I guess there’s no way to be certain. I wish I knew if he silver-plated any of his pieces.
Silver prices in the 60s and up until the late 70s silver was less than $3 per ounce. I still saw a lot of pre-1964 coins in change in the 70s so I question whether an accomplished silversmith would bother with plated material when coin and sterling could be had for reasonable prices. Plated goods would not be worth much to pawn. A lot of effort for little return.
An imposter perhaps? Or a later piece?
Honestly, you need to have it tested for silver content. “Looks like” is just an informed opinion based upon a cursory inspection of an image posted on the internet. Also when the stamped initials don’t match the putative craftsperson’s name, it’s more often the case than not that the maker has been misidentified.
Haven’t seen putative used in a sentence for a while. ![]() . Likely good to be skeptical when it comes to the questions of artist identity, etc.
. Likely good to be skeptical when it comes to the questions of artist identity, etc.
I have a question. Do all chip inlay cuffs have the 2 layers, and if so, are they usually smoothed out on the edges? I have one which does not appear to have 2.
Hi @Ziacat. Typically chip inlay starts out with a pattern cut for overlay like Hopi jewelry with two layers. The patterned layer on top and a backing layer. These are soldered together to form a unified whole before the piece is shaped and inlaid with chips and epoxy.
The only pieces not made this way are castings (usually) from handmade masters, or wax carvings, although there are numerous ways now to machine carve or print wax masters.
Chances are your cuffs have two layers. You might need a loupe to inspect the edge, but if you look closely enough you’ll usually be able to discern a very fine line or solder joint where the pieces are soldered together. Better pieces will have the joint blended and polished, but most of the time you’ll still be able to make it out if you know where to look and what to look for.
Solders with higher silver content are harder to detect, so if you can’t see it at all, it might just be made with a very high temp solder #70, or #75.
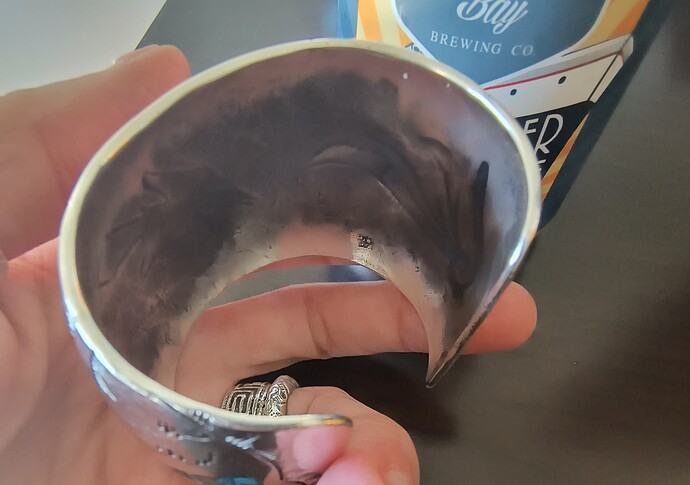
Thanks, I had no idea that chip inlay is made with two layers, but it makes sense. I’m on vacation, and chilling for a little bit in our hotel, and I always have this cuff with me when I travel. I don’t have a loupe, and I honestly can’t see the line, but I think I see places where it was smoothed out.
There might actually be a tiny line in that top photo, but I could not see it without the photo.
There’s a line. Looks like whoever made it used a higher temp solder so it’s harder to see. You have a thicker what looks like 16 or 18 gauge layer on the top, and thinner 24 or 26 gauge layer on the bottom. If you can see where there are a tiny pores appearing just above the bottom edge, that is your solder joint, and defines your layers.With a lower temp solder those pores might not be present, but it would be easier for a unpracticed eye to see the line because the joint would be a bit darker than the metal on each side.
Now I even more appreciate how this style is made, thanks!
