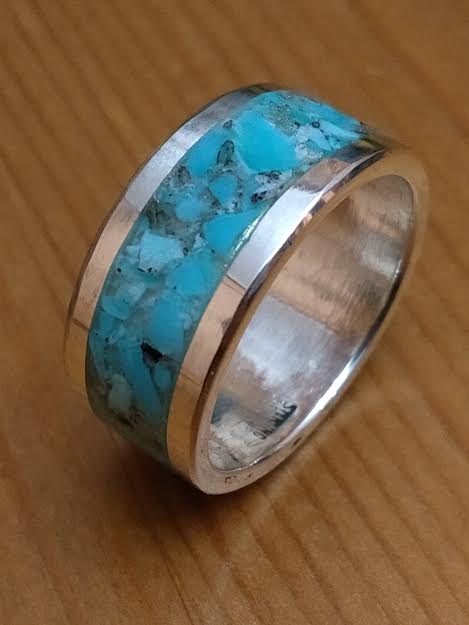
I never tried to make an inlay ring till this year. I welded three parts together to form the channel, added turquoise chips and superglue, sanded it flat and polished. Makes a nice ring.
7 Likes
The chunkier, natural look of the turquoise is a nice touch as opposed to some of the microchip crushed inlay soup pieces out there, almost looks like block was used. Positioning & gluing on the outside radius must have been a “learning curve” pun intended.
The metal work is clean & seamless. About how long from start to finish did it take?
3 Likes
Hey thanks, The fitting up and welding the three rings took about 20 minutes. The setting and gluing has to be done in 1/4 turns or it drips off. I experimented using activator to speed it up but that left a white haze in the resin. So this is something that just takes time, set 1/4 wait till it dries. Set another and wait. I find that its best to over fill and not worry too much about waste. That way you don’t have to go back and fill in low spots. The turquoise is scraps from my cuttings anyway. Actual hands on working time about1 hour. I love the learning curve comment  Kyle
Kyle
3 Likes
I’ve gotten more interested in this than I expected. Mind a couple of questions?
Like,can the resin be tinted? Providing contrast,shading,depth? Stir chips into resin & pour or add chips on/into resin…more like a mosaic? Would something like labradorite/abalone still display a flash?
1 Like
Yes you can use colorants in resins like Devcon epoxy 5min. If you prefer a quicker set use superglue. I dont know how you could add colorants to this because of the fast reaction time. HOWEVER…you can add powders and dust of whatever color as you work. When I make a ring like this I use three grades of material. larger chunks, finer grinds and lastly some that is the size of fine beach sand. This fills in all the cracks and voids as you work.
As far as what materials can be used, I can attest to abalone, turquoise, chrysocolla and opal shown below. The camera doesn’t really catch the fire of these…they are fantastic!!

Like Opal, it is important to catch the band of flash as you cut labradorite. so careful planning is required with your pieces. The work is done on the band itself. I work by placing the band in a tweezers in an upright position and a few chips then a drop of glue. Add larger chips to the glue that’s on the ring then the sand. Pack it down gently. let that dry. This gives you a base or wall to work against as you continue to build in this manner. After you have filled 1/4 of the band let it set up enough then it will not drip off as you turn the ring. later turn and repeat the process. it is best to overfill so you can level the surface later. If wile leveling you find a void add glue and stone powder/ sand to fill it. If after dressing the surface down you have an area of glue without stone this can be drilled out carefully and more stone added in that area.
If you have lapidary equipment you know how to dress the surface down. If not you can use diamond files to ruff cut the stones and then use emery cloth on a flat stick in progressively finer grits to obtain a polish. You can buy the base channel rings in a variety of materials from ebay , etsy and others. As for me I make the inner band like a flat wedding band then use square wire 14ga or larger to make two rings that fit tightly on top of the first band then weld that in place. I check my welds for completeness and clean the edges up. I don’t worry what the channel looks like inside, the rougher the better. I make sure there is no oils of buffing compound in the channel and then I fill it as described. To crush up turquoise I use some saw scraps and crush them with pliers. I then run this through two sizes of window screen. Have fun ! Kyle Lots of videos on youtube !
1 Like