Turquoise People Auctions – Getting Started
Table of Contents
Turquoise People Auctions – How to Register an Account
Turquoise People - How to Sell an Item
Creating an Auction Listing
Creating a Fixed Price Listing
Turquoise People Auctions – How to Register an Account
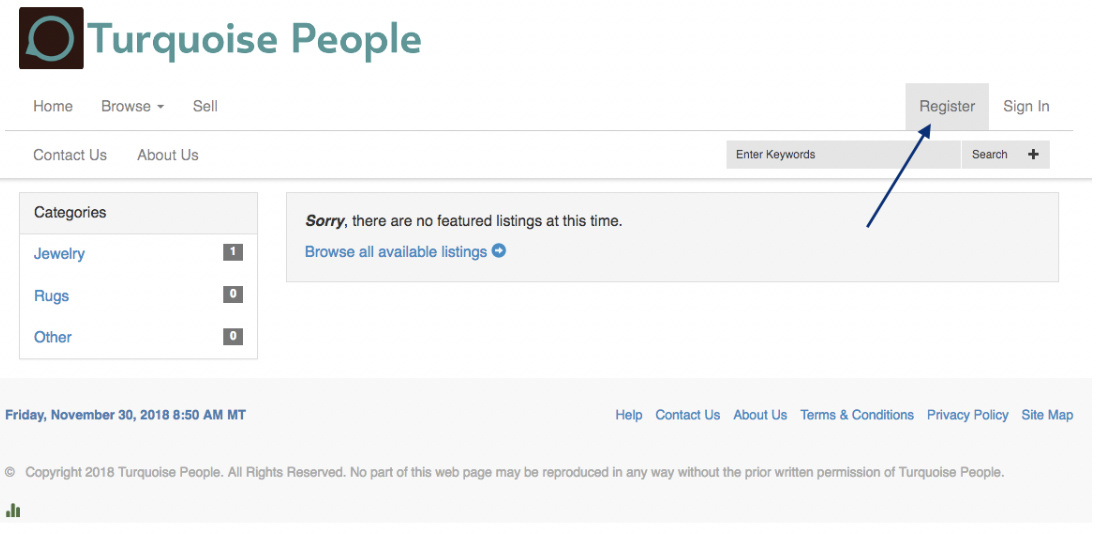
- Go to: https://auction.turquoisepeople.com/
- Click on the ‘Register’ link in the top right of the website:
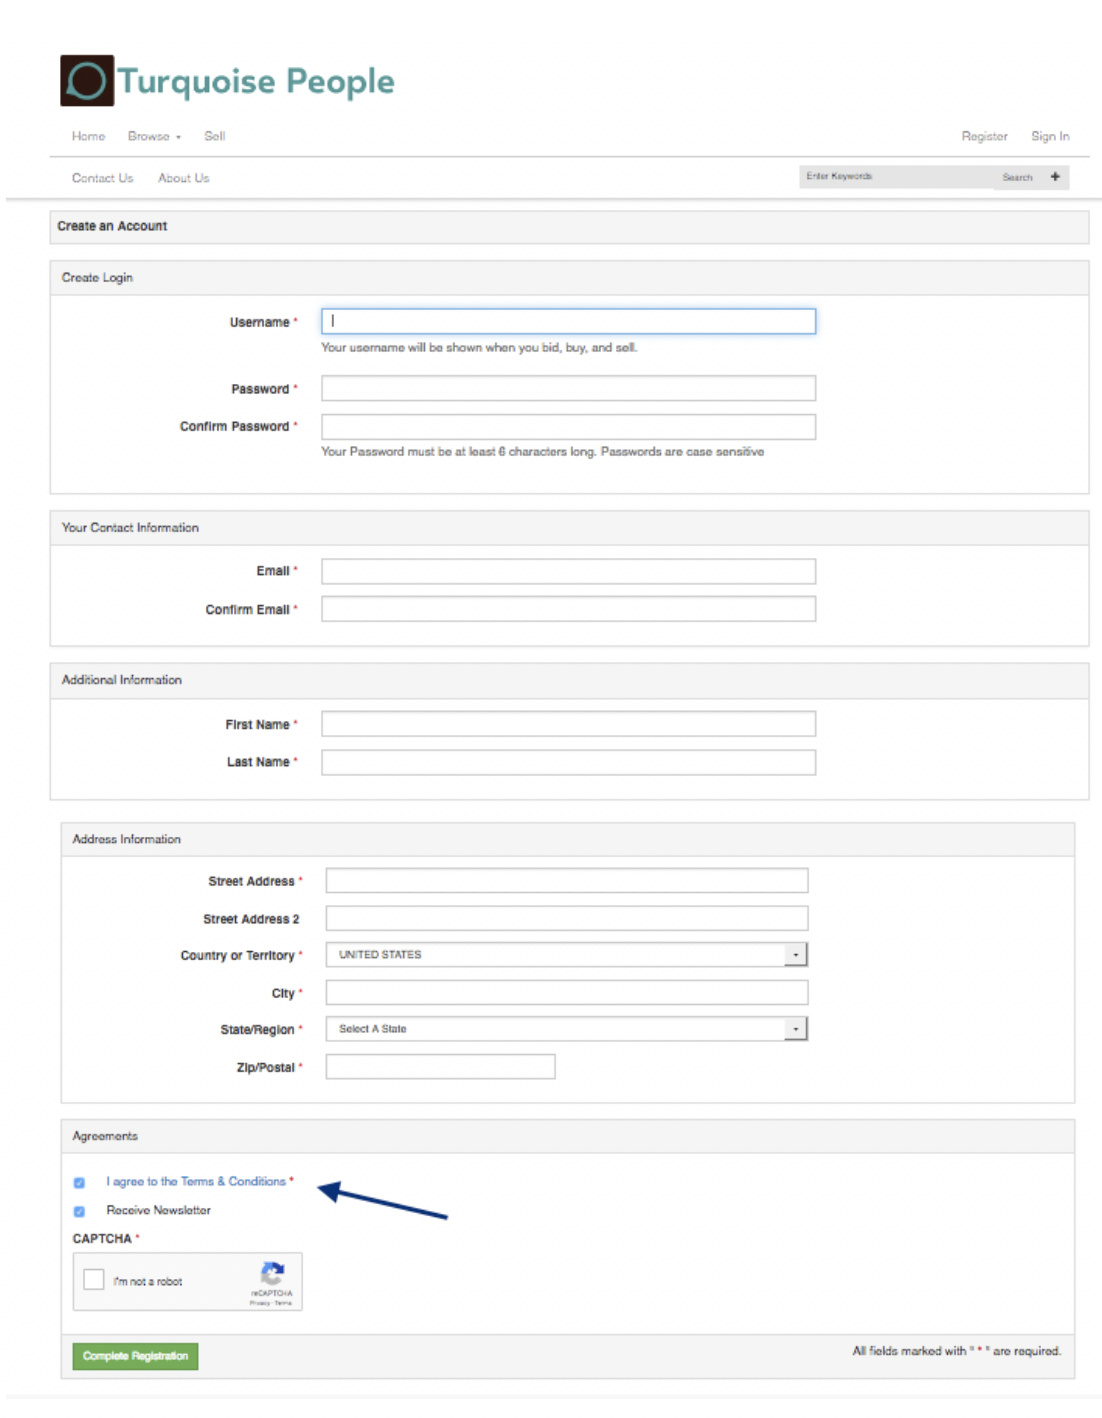
- Complete the form to Register your Account.
a. Your name, email address and mailing address are required to Register
b. Write down your password so you remember it
c. Review and agree to the Terms and Conditions
d. Choose whether to receive our Newsletter
e. Click on ‘Complete Registration’
- After you complete your registration, you will be redirected to a new page to enter your username and verification code.
a. Check your email for the code and click on the link to verify, or:
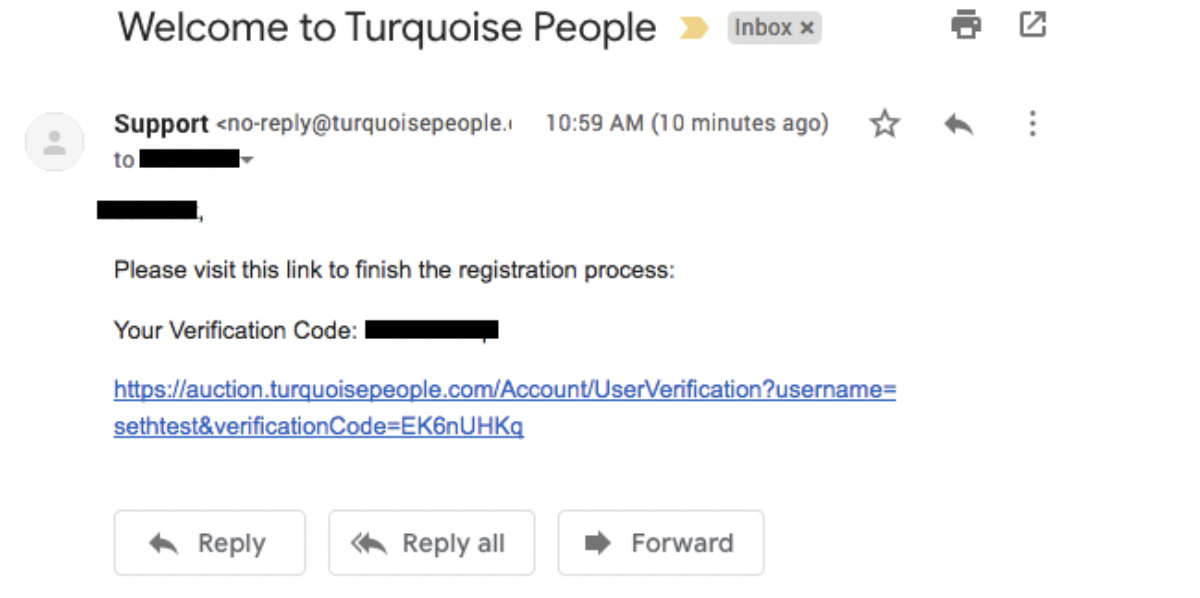
b. Enter your username and copy and paste the verification code on the site:

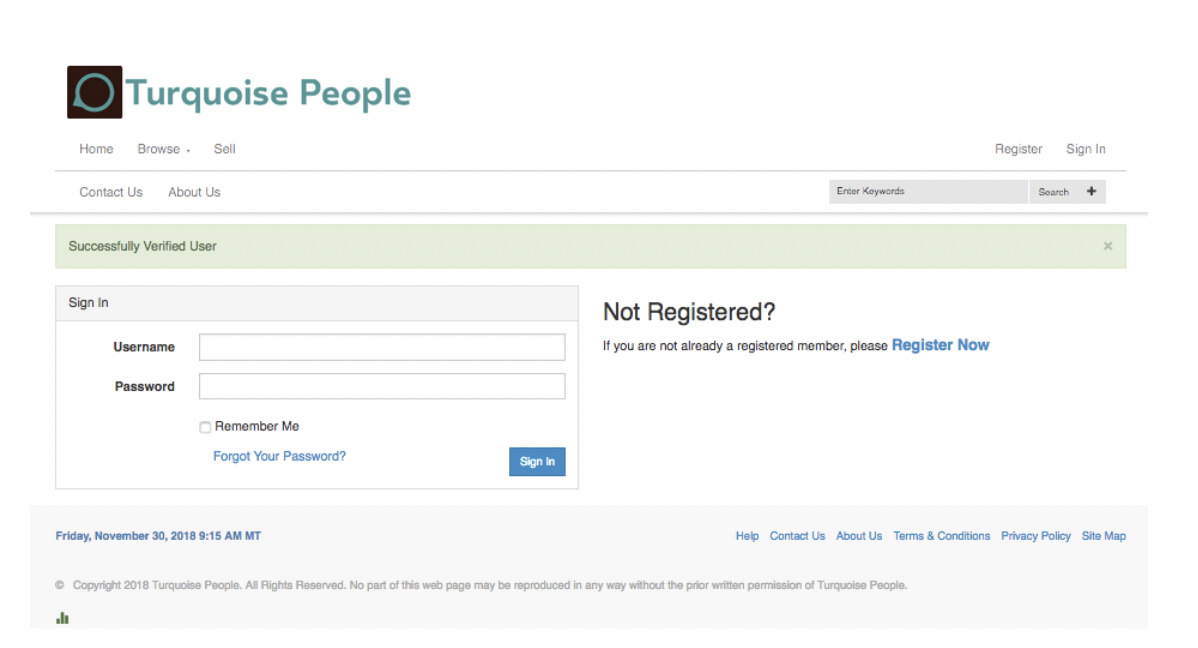
- Once complete, you will be directed to the Sign In page and will see a notification ‘Successfully Verified User’. You can now enter your username and password you created to Sign In:
- After signing in, you will be directed to Main Page and you will see your account name listed in the top right:
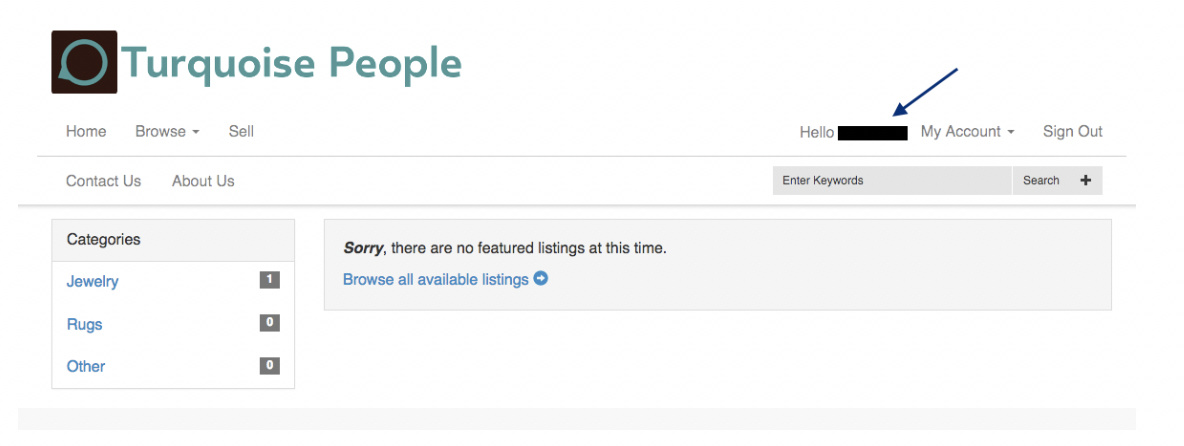
-
Congratulations! You have successfully registered your Account. Click here [ link to How to Sell] to learn how to create your first listings.
Turquoise People - How to Sell an Item -
First, make sure you have Registered an Account [link to how to register account]
-
After you have registered and signed in to your account, click on the link to ‘Sell’ in the top left of the site:
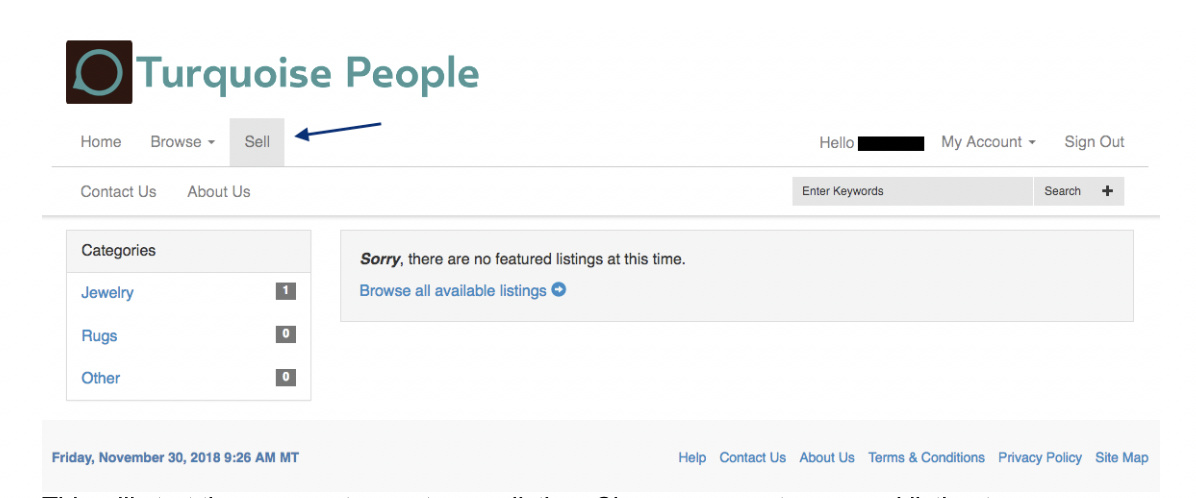
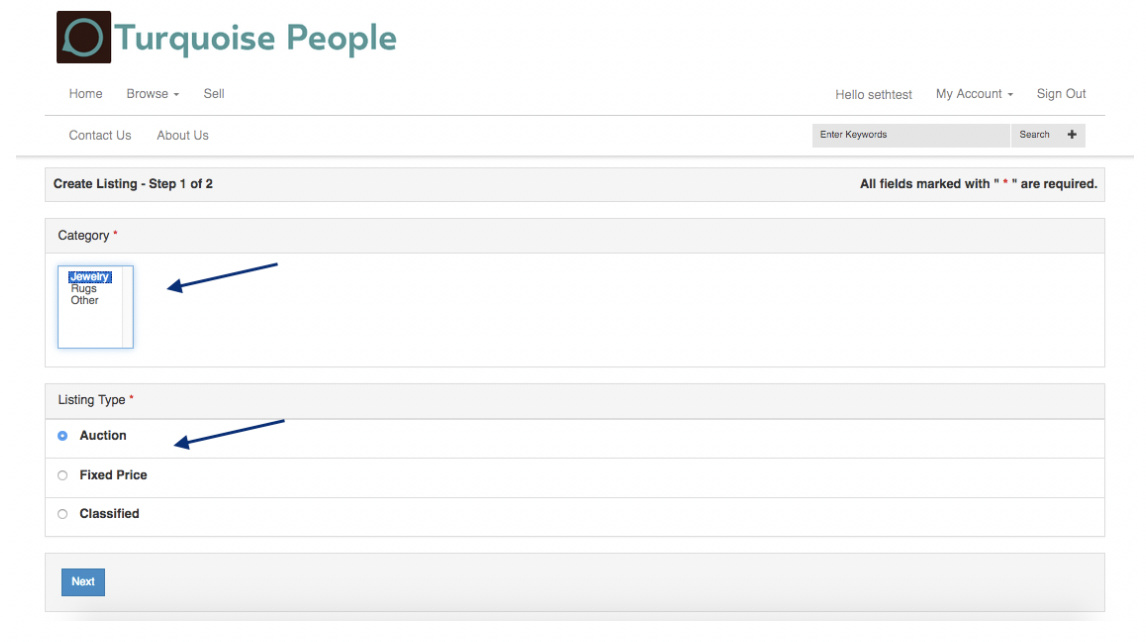
- This will start the process to create your listing. Choose your category and listing type: Auction, Fixed Price or Classified, then click on Next to continue creating your listing:
- Follow the steps below depending on your listing type:
Creating an Auction Listing
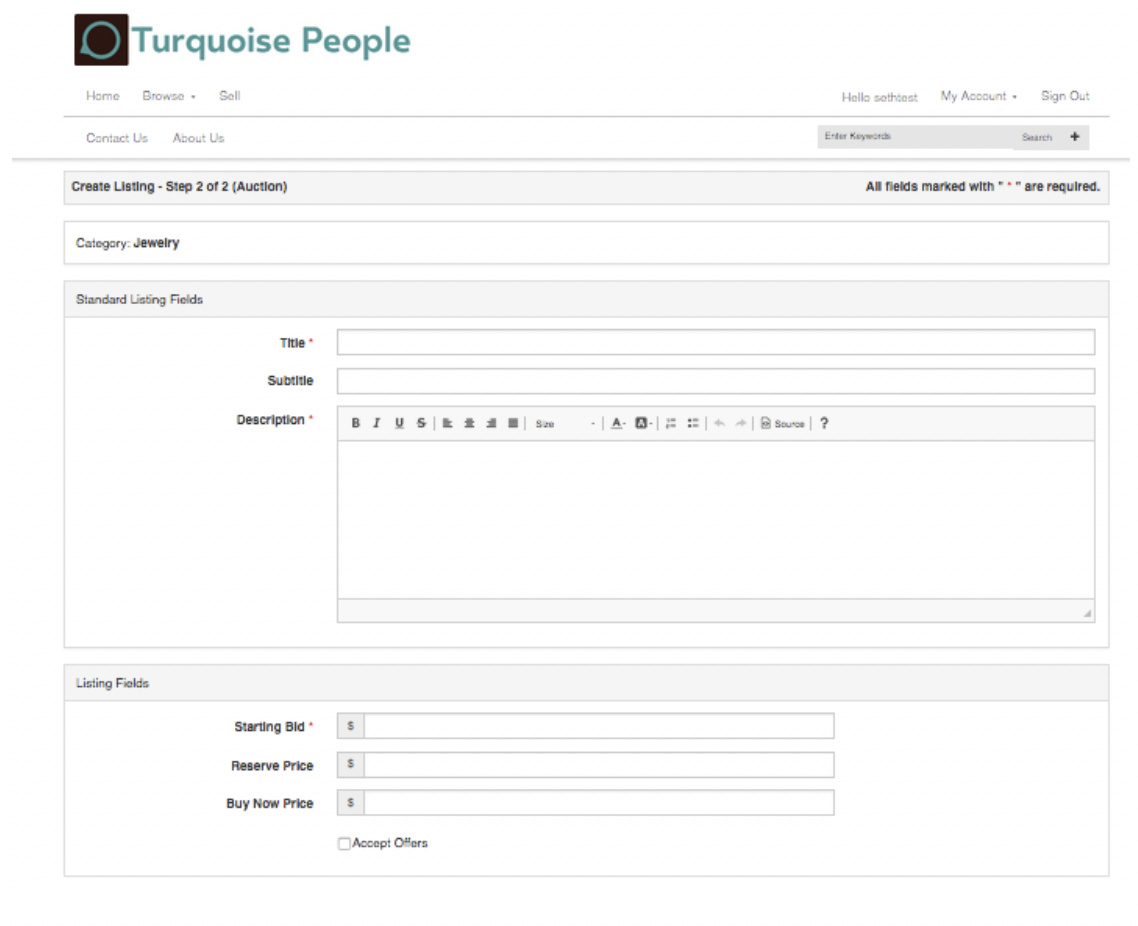
- Enter the basic information about your listing including the Title, Description and Starting Price.
a. The Title is limited to 80 characters
b. You can style your description using the options in the editor for bold, italics, underline, font size and more
c. Reserve Price and Buy It Now Price are optional
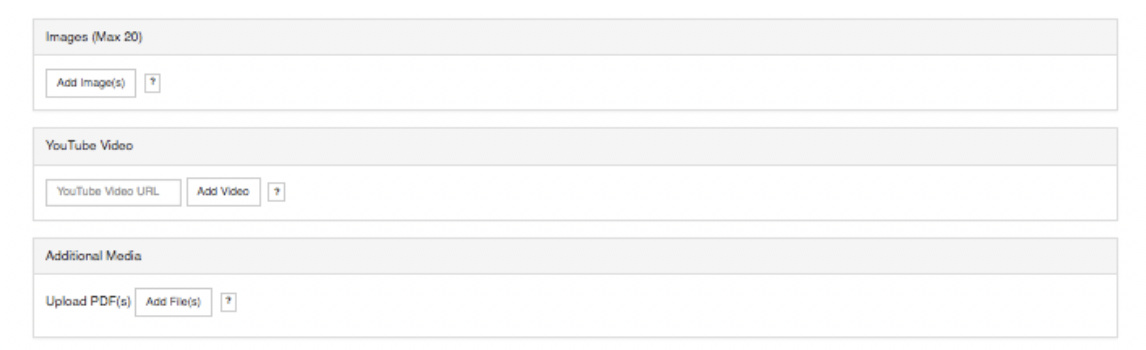
- Upload photos and link to other media and choose your listing options:
For images:
a. We recommend images that are at least 1000px by 1000px.
b. Take photos on a plain white background when possible
c. Use plenty of light, and natural light is always best
d. Take any close-up images of details or defects you want to highlight
For YouTube:
e. Include the full URL of the video you are linking to
For Documents:
f. You may upload PDF files with additional information or scans of certificates of authenticity you would like to include.
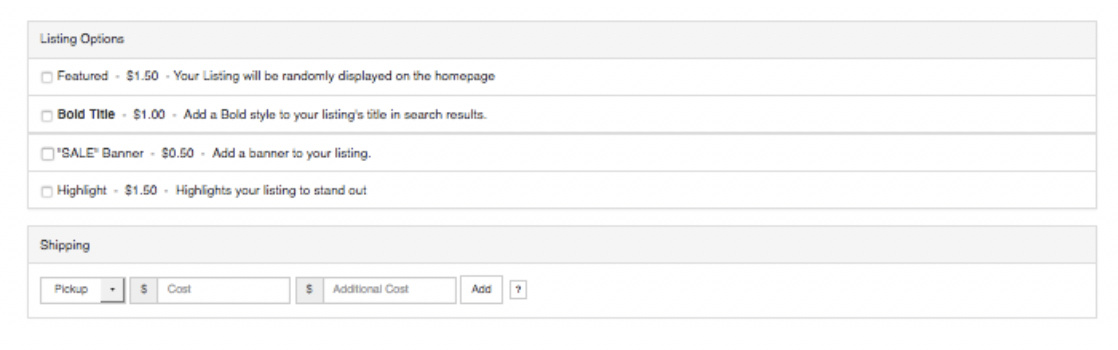
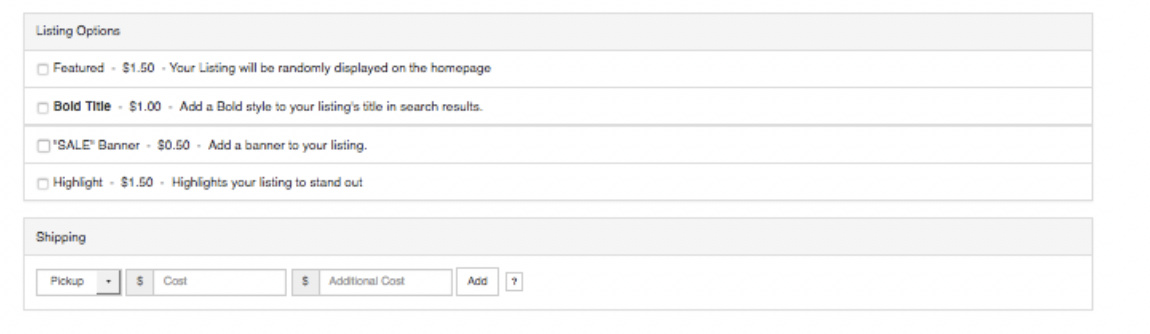
- Choose any Listing Options to feature or promote your Listing and enter your Shipping Information.
For Shipping Information:
a. Click the ‘Add’ button after entering your Shipping information to add the specified shipping service and cost
b. You can enter more than one type of Shipping service, click the ‘Add’ button after entering the information for each service
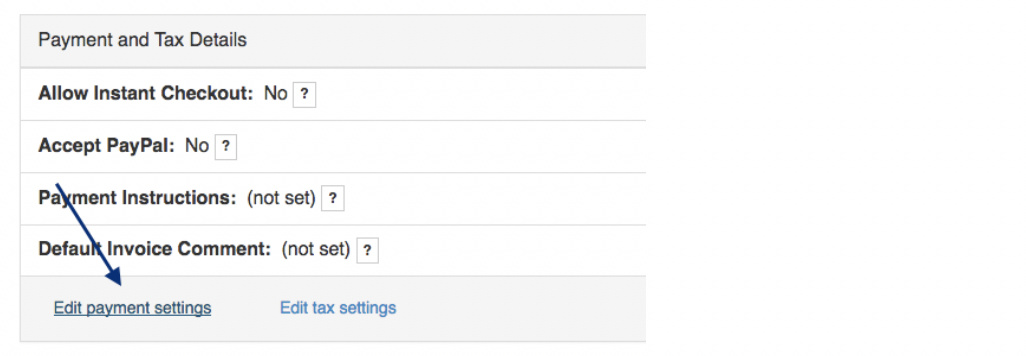
- Enter your Payment Details
a. If this is your first listing, click on ‘Edit payment settings’:
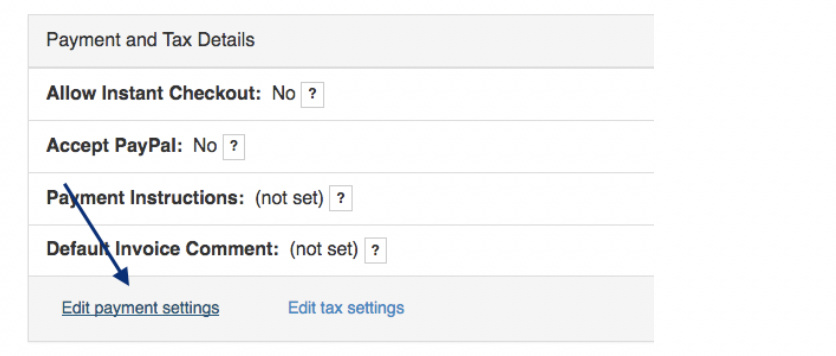
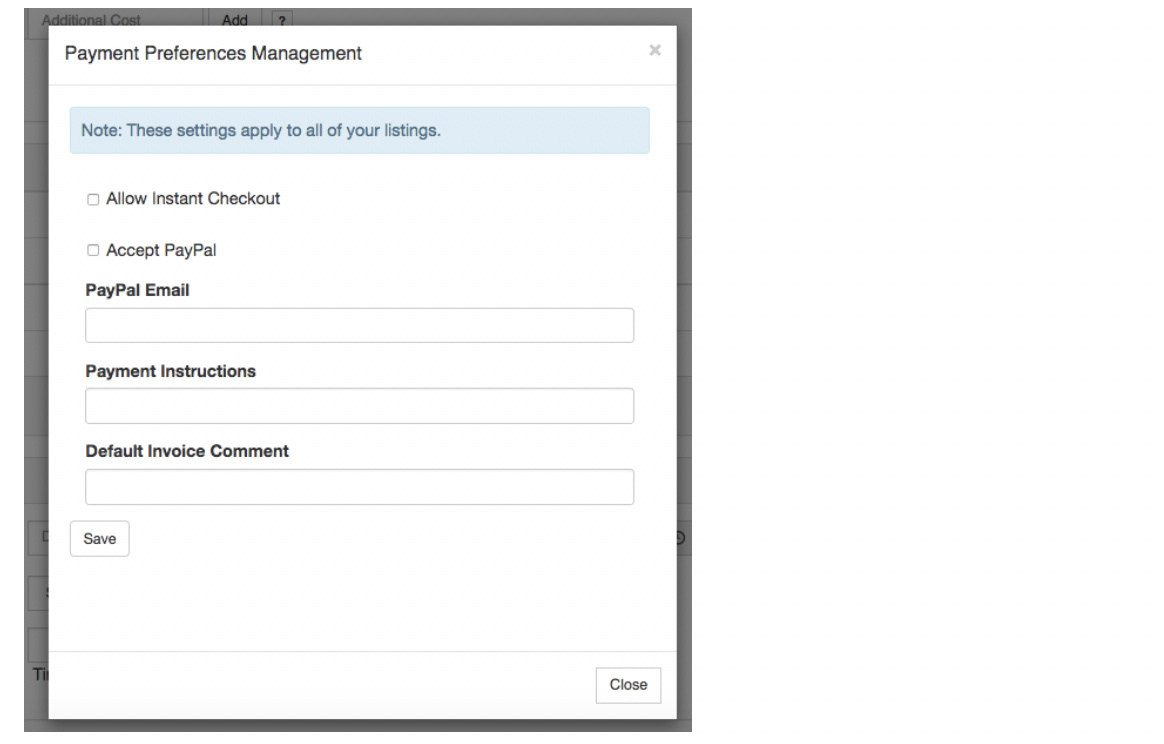
b. A window will popup to enter your Payment Preferences. Note that these will be the settings that apply to all your listings:
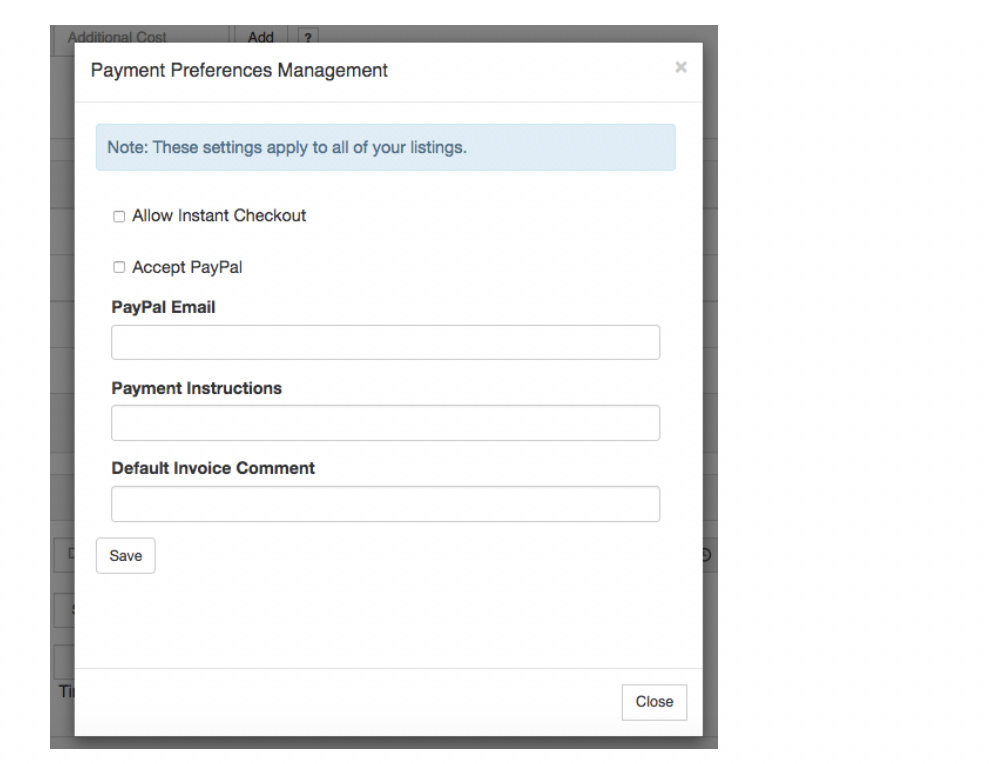
c. We recommend Instant Checkout. However, if you have special Shipping calculations or other needs, you may choose to not select this option. When Instant Checkout is not selected, you will need to send an invoice including all charges to the buyer after the Listing has sold.
d. Choose ‘Accept Paypal’ and enter your PayPal email address to receive payments.
e. Include any special notes in ‘Payment Instructions’
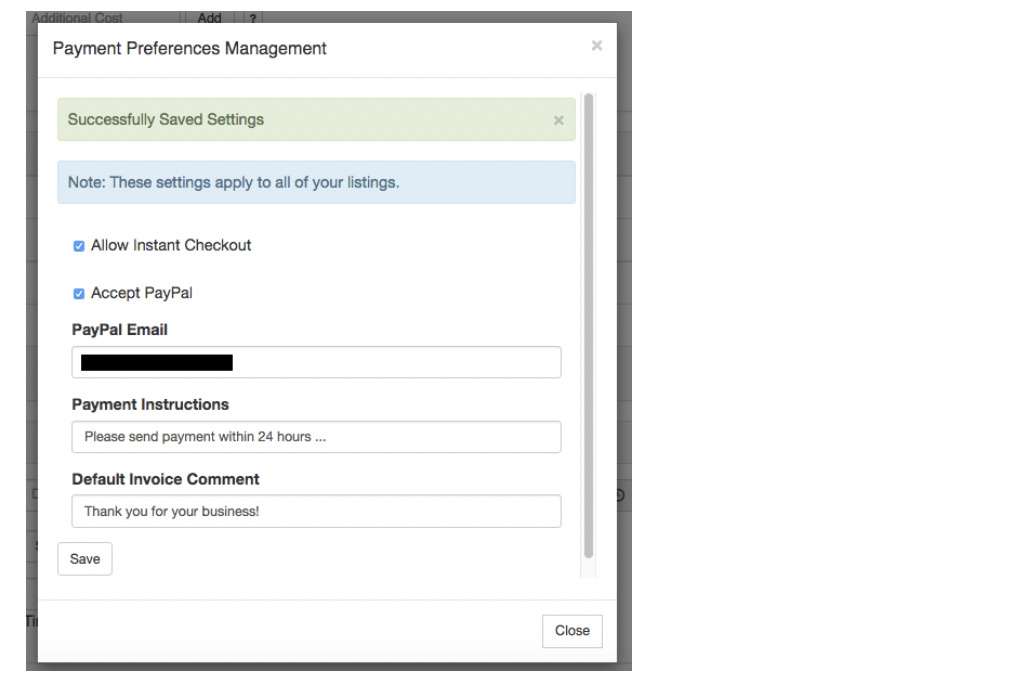
f. Add a Default Invoice Comment such as “Thank You for your business!” You do not need to include the quotation marks.
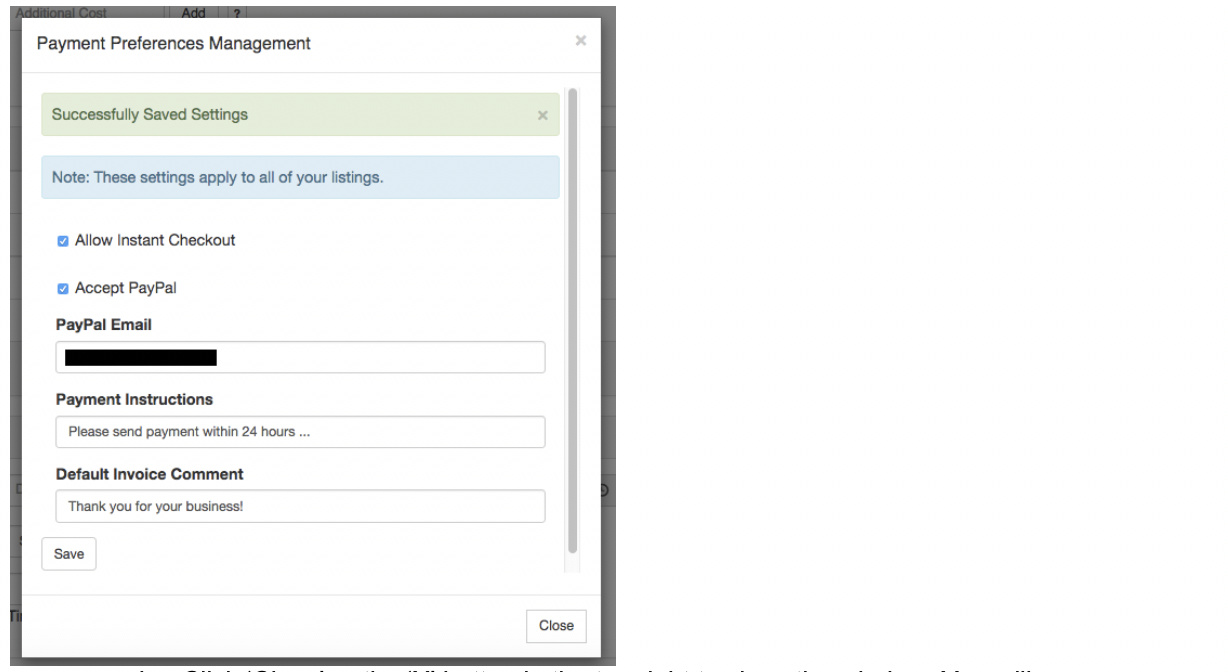
g. Click ‘Save’ when you are done and a message will appear notifying you the settings have been saved.
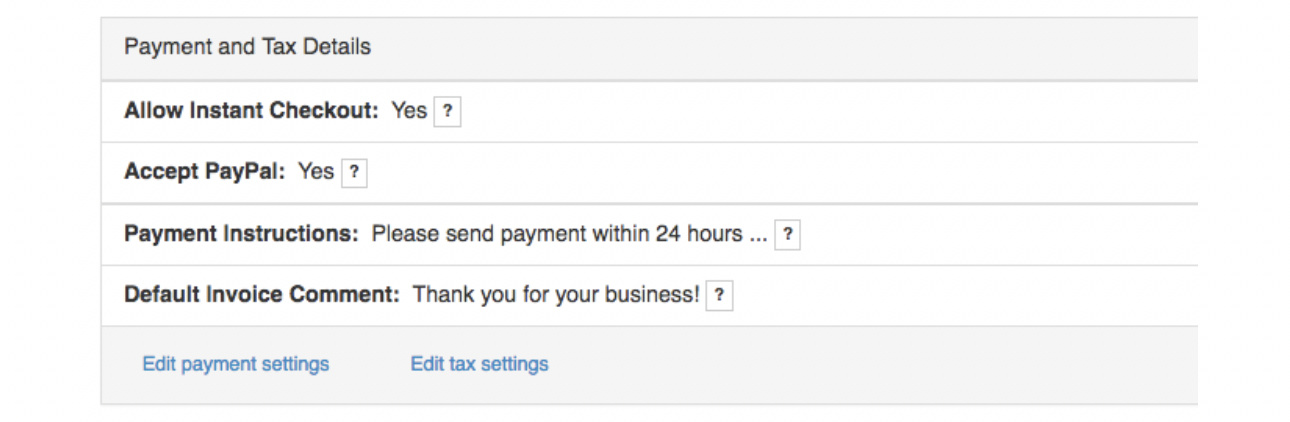
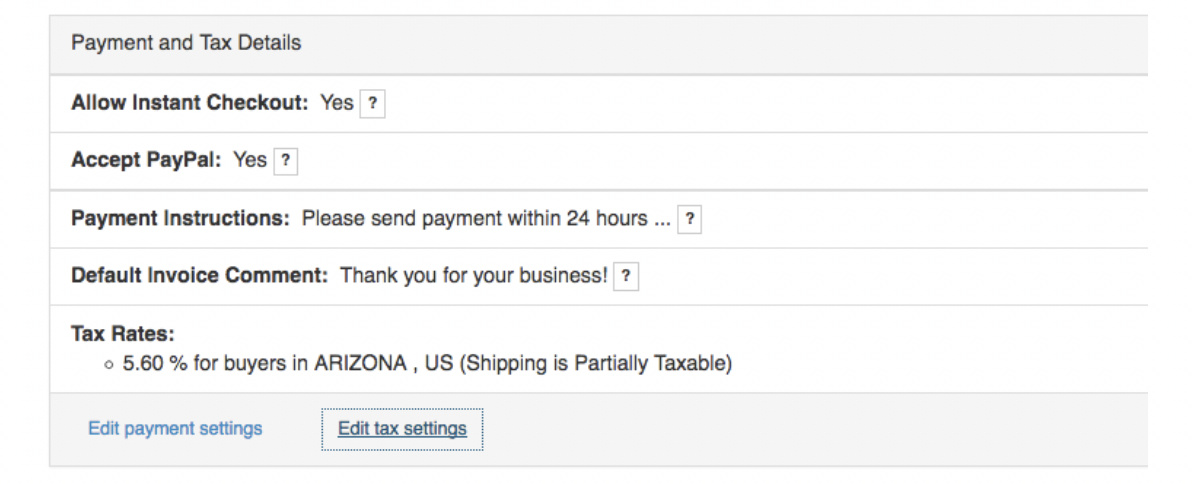
h. Click ‘Close’ or the ‘X’ button in the top right to close the window. You will now see your settings listed in the Payment and Tax Details section:
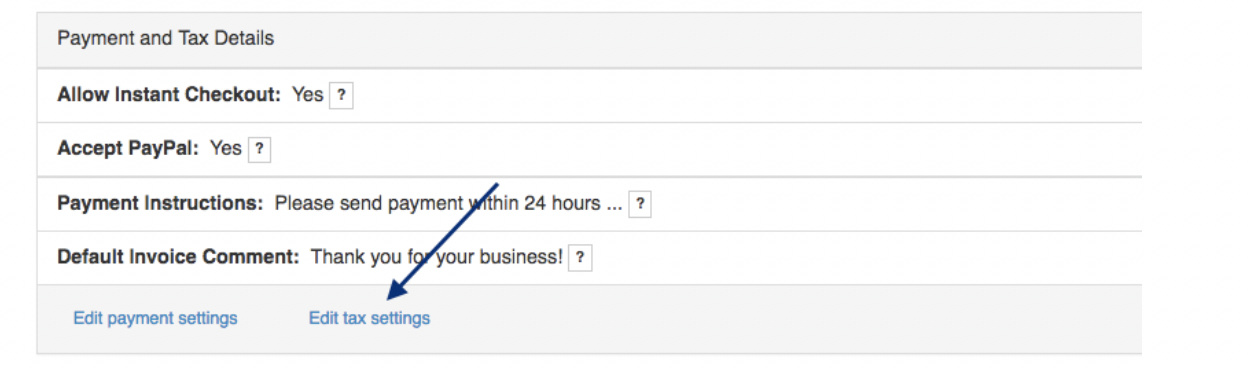
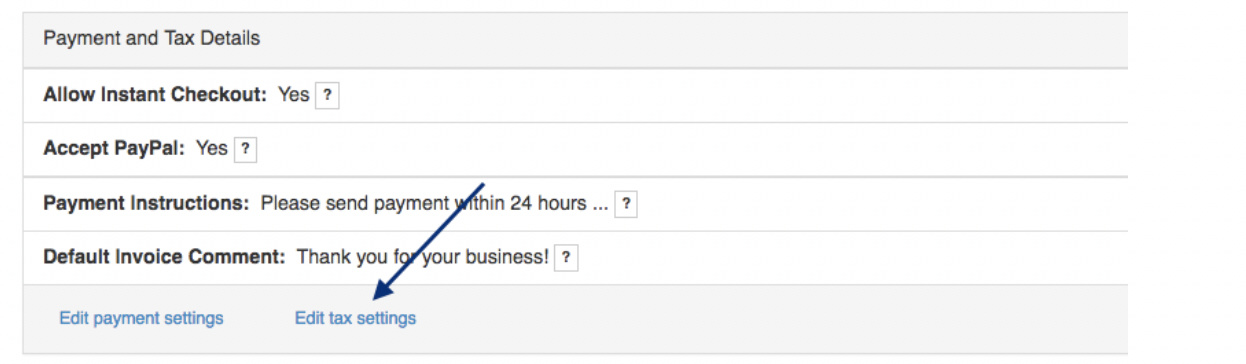
- Enter your Tax Details
a. If this is your first listing, after entering your Payment Details, you should click on ‘Edit tax settings’ to enter your Tax Details
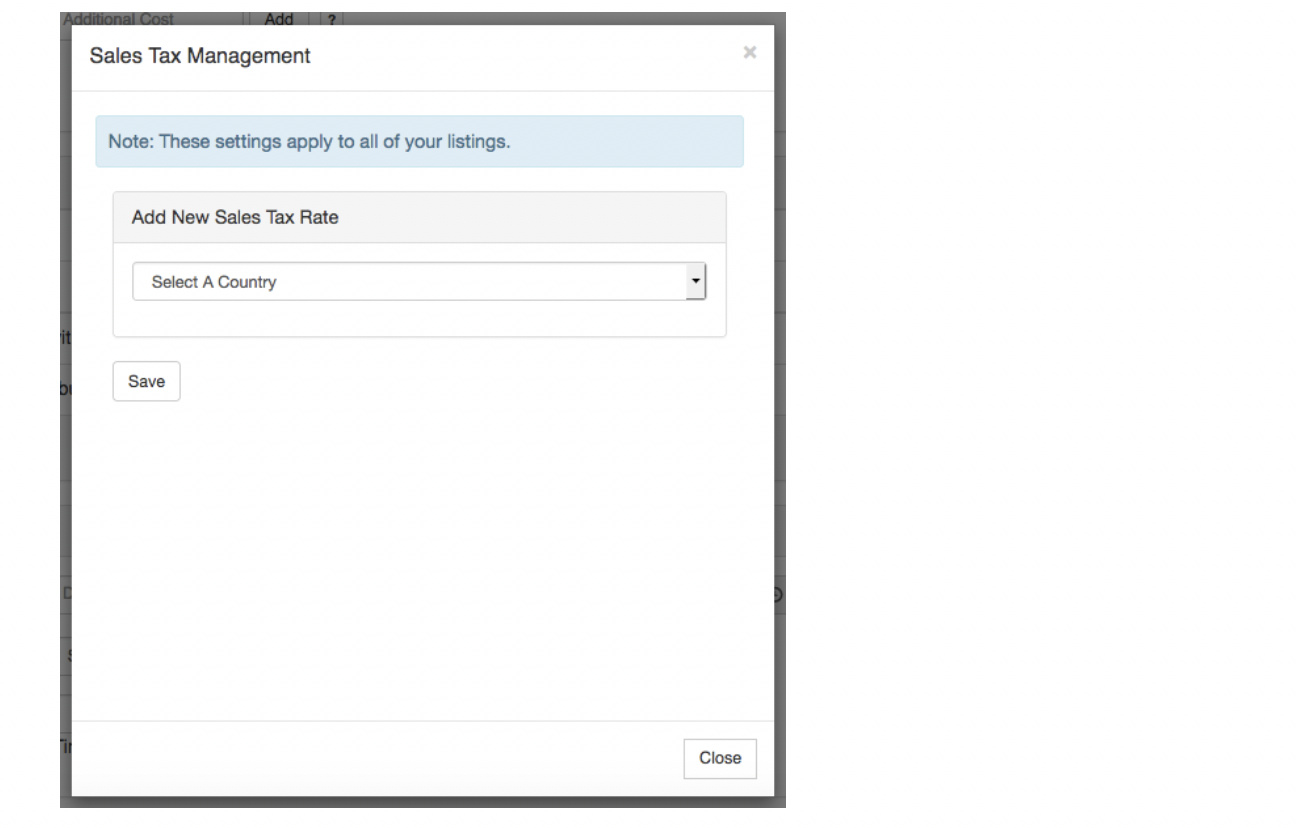
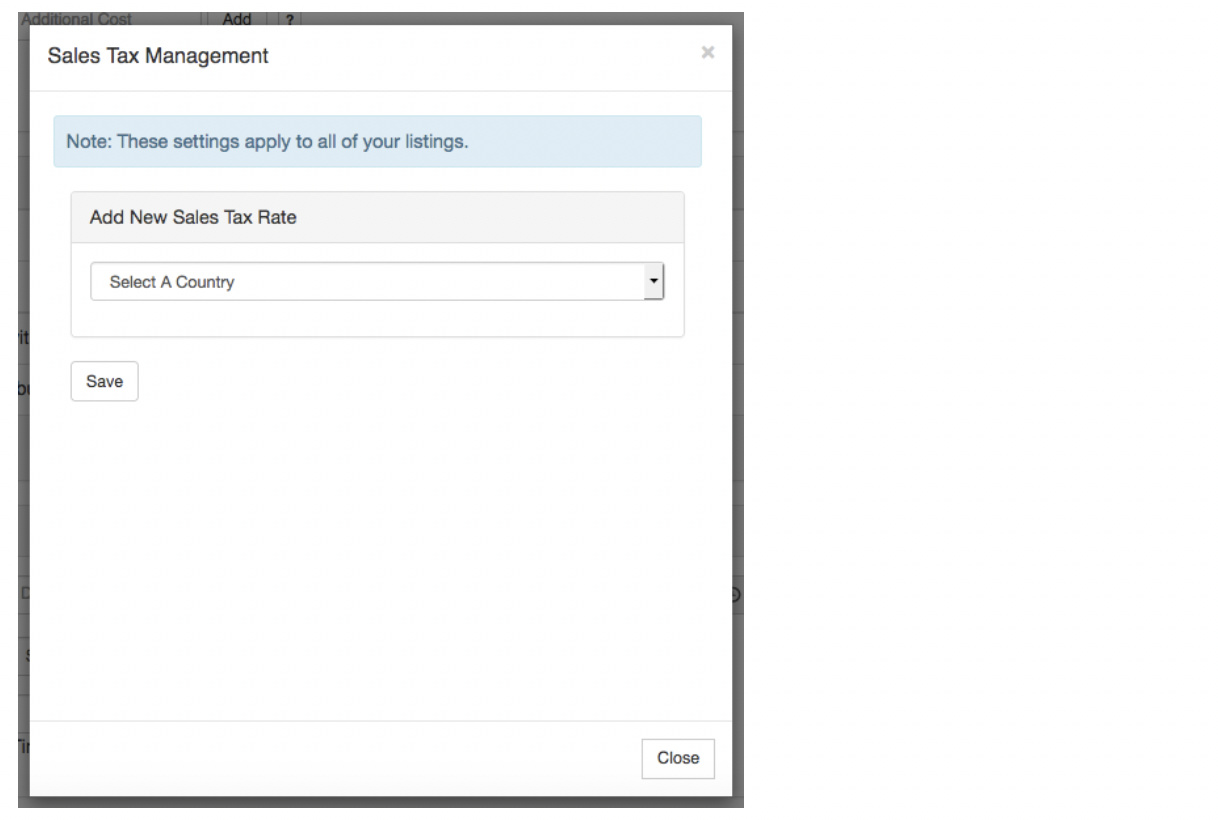
b. A window will popup to enter your Sales Tax details. Note that these will be the settings which apply to all your listings. Choose your Country:
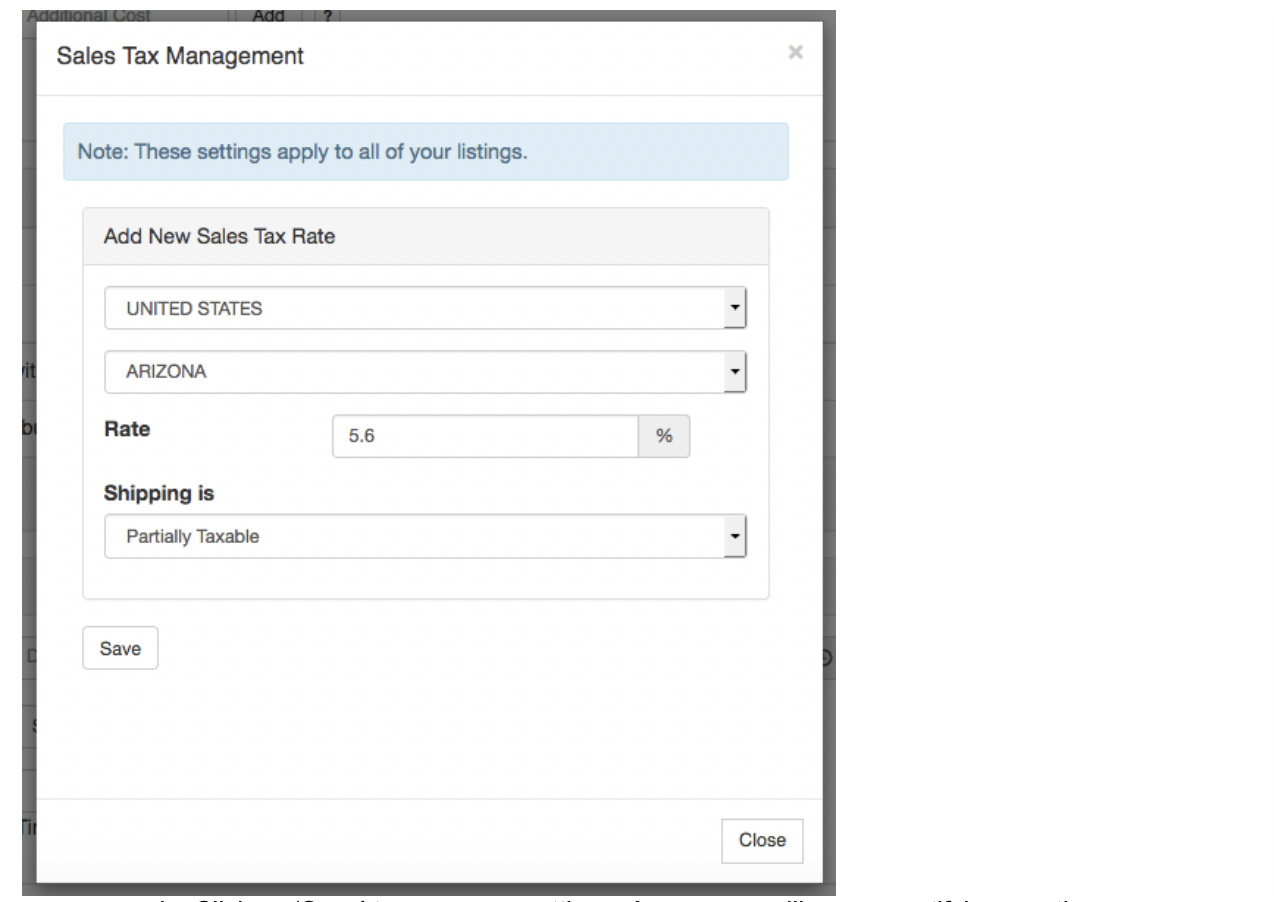
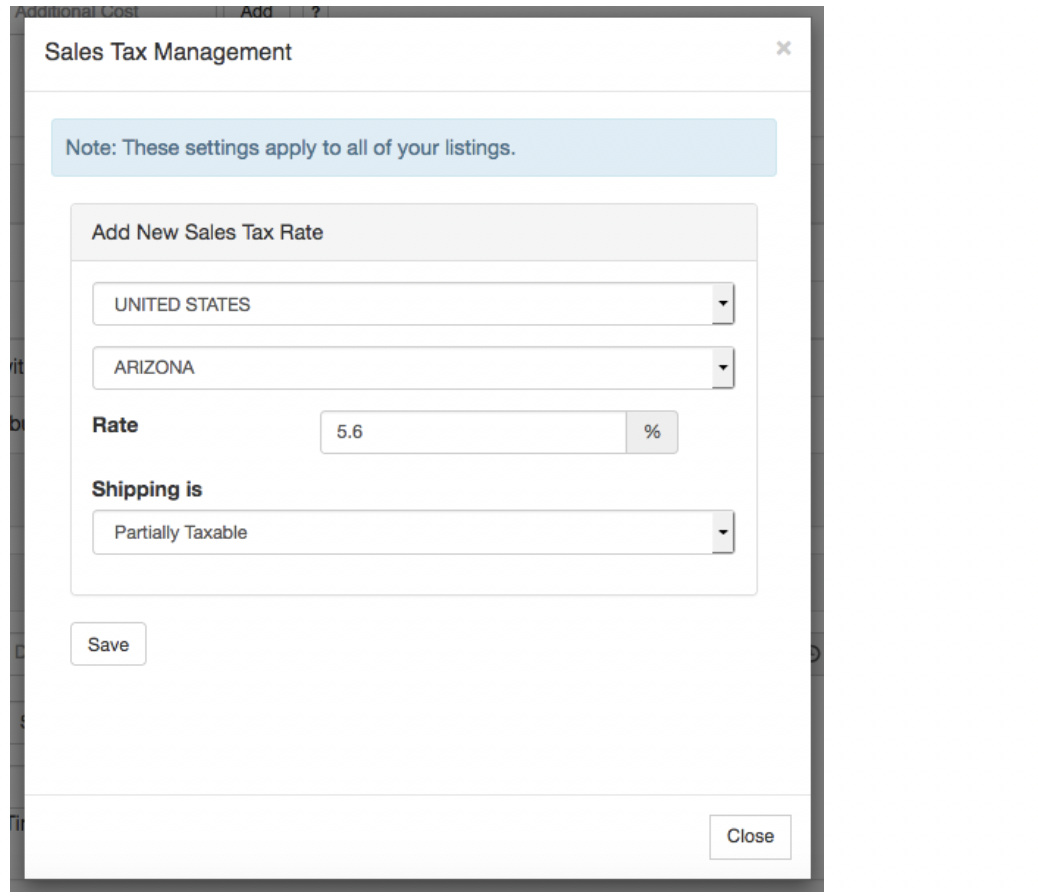
c. After choosing your country, additional fields will appear to choose your State and enter your specific tax rate and whether Shipping is Not Taxable, Partially Taxable or Fully Taxable. In some states, the shipping cost is not taxable, but any handling fees are. Be sure to check the details for your location.
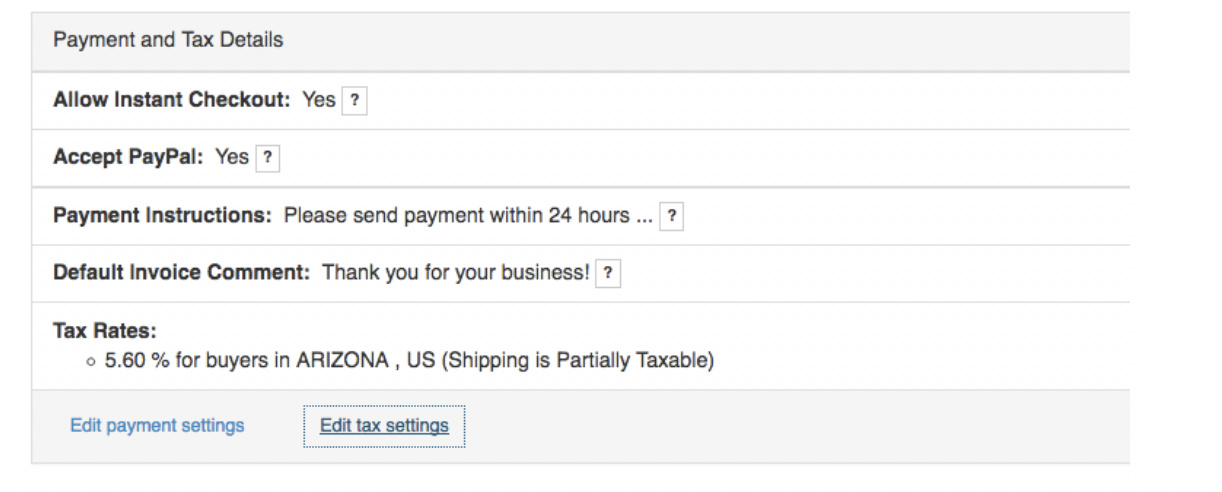
d. Click on ‘Save’ to save your settings. A message will appear notifying you the settings have been saved. A new field will appear to enter another tax rate. You may enter additional tax rate information as necessary. This is typically for businesses which hold offices in multiple states. Save your settings each time you add another tax rate. When done, click on ‘Close’ or the ‘X’ button to close the window. You will now see your Tax Rates listed under the Payment and Tax Details section:
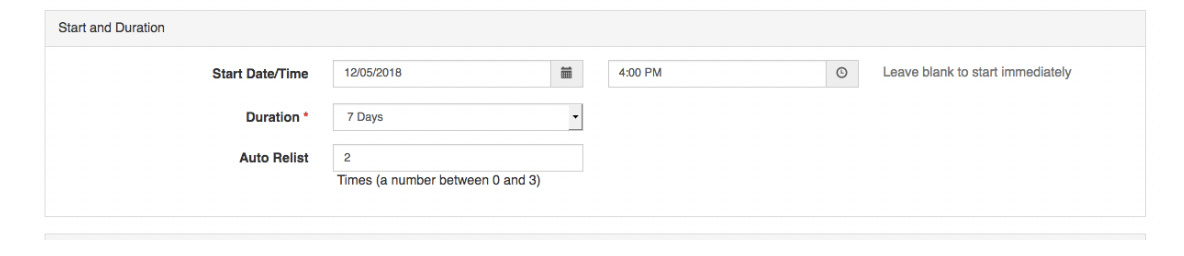
- Choose the Start Date/Time and Duration of your Auction:
a. Clicking in the Date field will bring up a calendar to choose the date, clicking in the Time field will bring up a number pad that includes AM and PM buttons
b. You can leave the ‘Start Date/Time’ fields blank and your Listing will start immediately after you click on ‘Create Listing’.
c. For ‘Duration’ you may choose 3, 5, 7 or 10 days. We recommend at least 7 days to get maximum exposure for your items.
d. You may choose to ‘Auto Relist’ up to 3 times. Type the number of times you would like to automatically relist your item in case it doesn’t sell. To not automatically relist, enter 0 in the ‘Auto Relist’ field.
- Once you are complete, review your listing, then click on ‘Create Listing’ to list your Auction.
a. Forgot something, or need to take some more photos? You can also click on ‘Save Draft’ and the Listing Draft will appear in your Account to complete later.

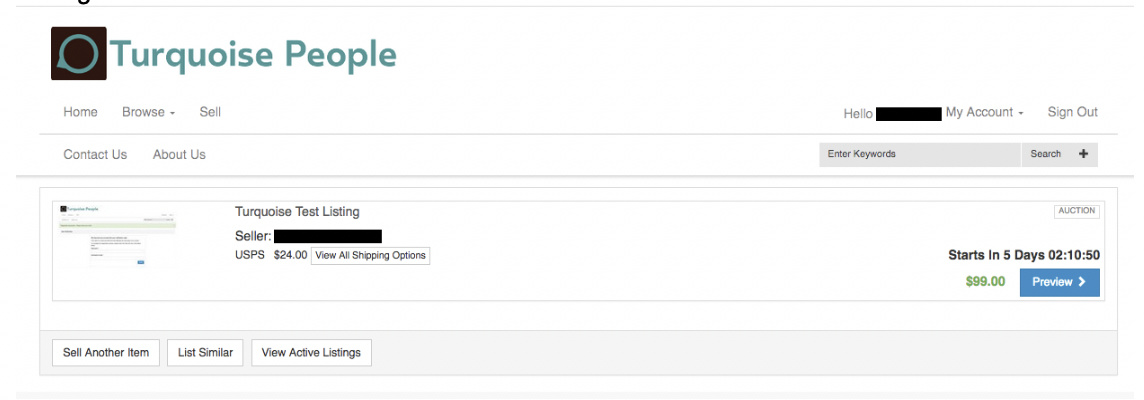
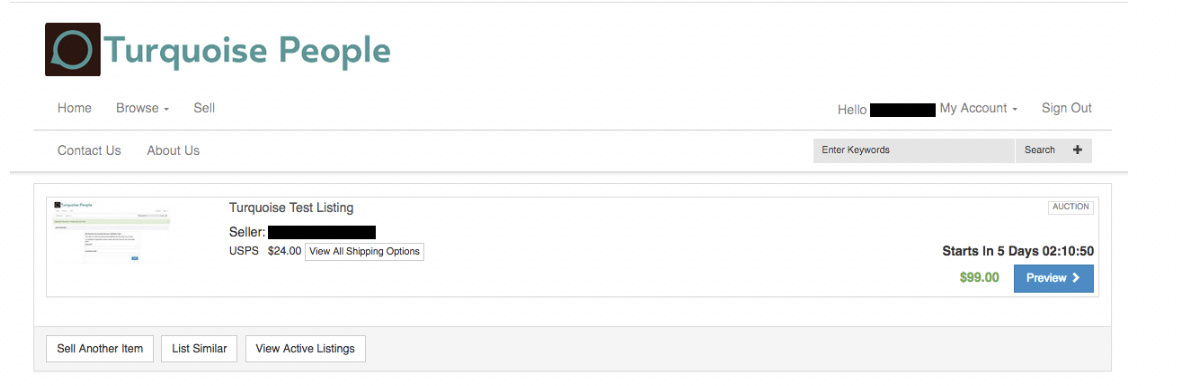
- After your listing is created you will be directed to a page which provides a summary of your listing.
a. For scheduled listings, you can see how long until the listing will launch, and also Preview the listing. You may also choose to ‘Sell Another Item’, ‘List Similar’ or ‘View Active Listings’.
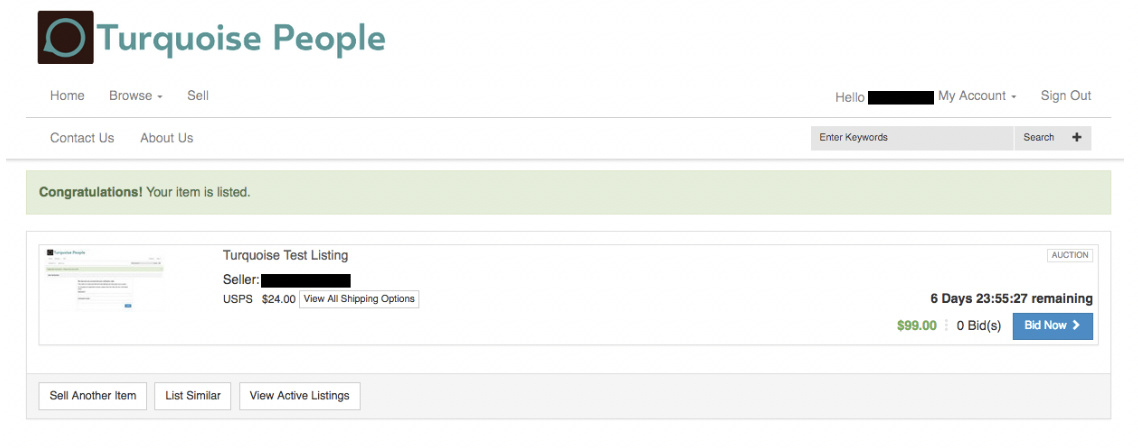
b. For listings that are listed immediately, you will see a notification that your Listing has been created and is live. You will also receive an email notifying you that your listing was successful. Click on the ‘Bid Now’ button to view your listing. You may also choose to ‘Sell Another Item’, ‘List Similar’ or ‘View Active Listings’.
Creating a Fixed Price Listing
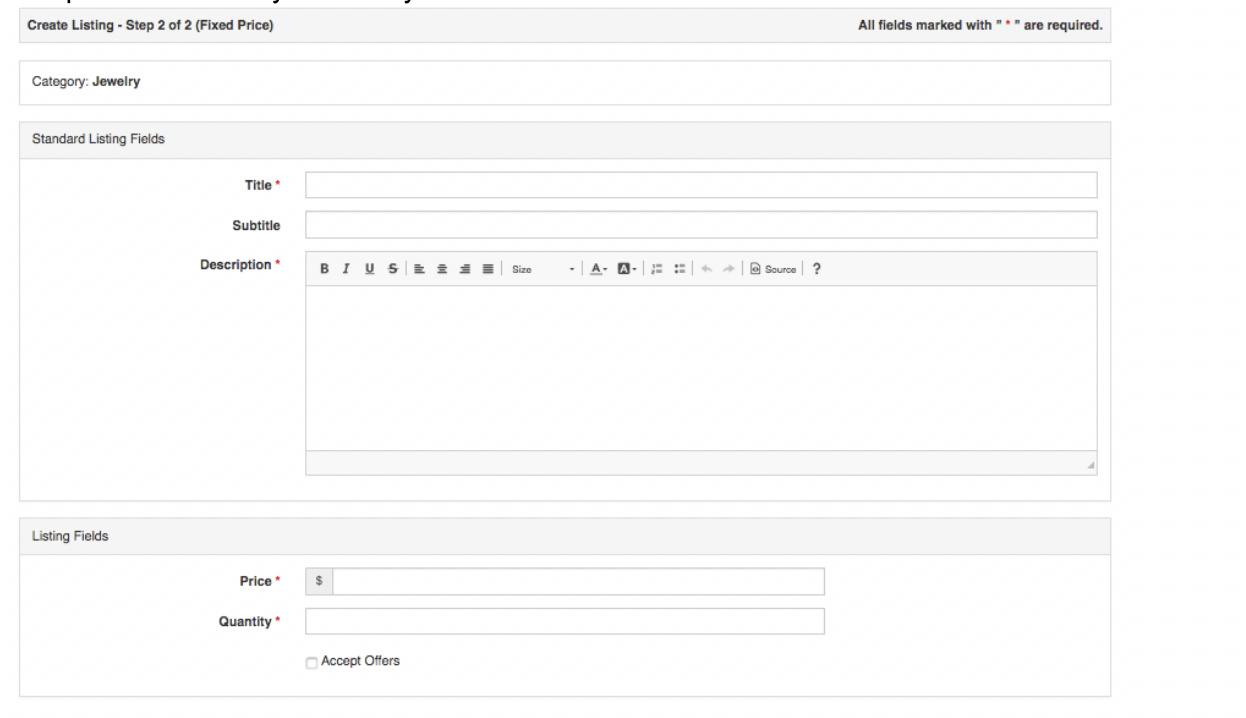
- Enter the basic information about your listing including the Title, Description, Price and Quantity.
a. The Title is limited to 80 characters
b. You can style your description using the options in the editor for bold, italics, underline, font size and more
c. Check the box if you want to ‘Accept Offers’ for your item. You will be notified and given the option to review any offers for your items.
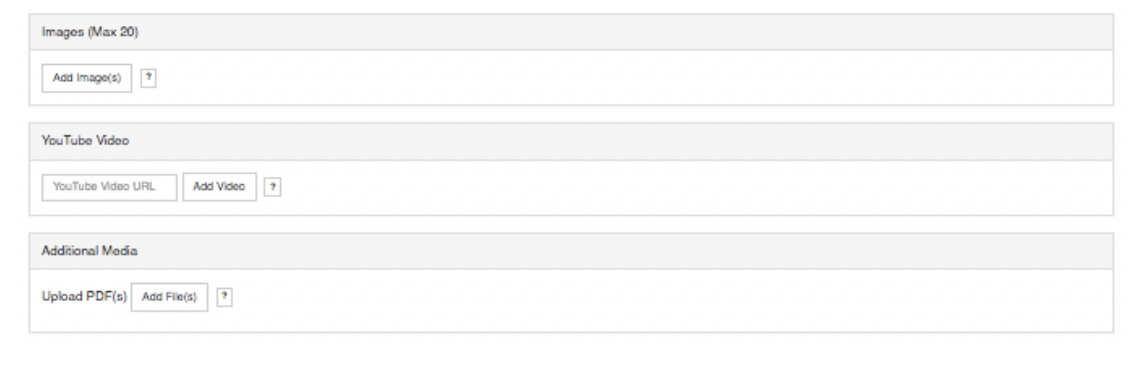
- Upload photos and link to other media and choose your listing options:
For images:
a. We recommend images that are at least 1000px by 1000px.
b. Take photos on a plain white background when possible
c. Use plenty of light, and natural light is always best
d. Take any close-up images of details or defects you want to highlight
For YouTube:
e. Include the full URL of the video you are linking to
For Documents:
f. You may upload PDF files with additional information or scans of certificates of authenticity you would like to include.
- Choose any Listing Options to feature or promote your Listing and enter your Shipping Information.
For Shipping Information:
a. Click the ‘Add’ button after entering your Shipping information to add the specified shipping service and cost
b. You can enter more than one type of Shipping service, click the ‘Add’ button after entering the information for each service
- Enter your Payment Details
a. If this is your first listing, click on ‘Edit payment settings’:
b. A window will popup to enter your Payment Preferences. Note that these will be the settings that apply to all your listings:
c. We recommend Instant Checkout. However, if you have special Shipping calculations or other needs, you may choose to not select this option. When Instant Checkout is not selected, you will need to send an invoice including all charges to the buyer after the Listing has sold.
d. Choose ‘Accept Paypal’ and enter your PayPal email address to receive payments.
e. Include any special notes in ‘Payment Instructions’
f. Add a Default Invoice Comment such as “Thank You for your business!” You do not need to include the quotation marks.
g. Click ‘Save’ when you are done and a message will appear notifying you the settings have been saved.
h. Click ‘Close’ or the ‘X’ button in the top right to close the window. You will now see your settings listed in the Payment and Tax Details section:

- Enter your Tax Details
a. If this is your first listing, after entering your Payment Details, you should click on ‘Edit tax settings’ to enter your Tax Details
b. A window will popup to enter your Sales Tax details. Note that these will be the settings which apply to all your listings. Choose your Country:
c. After choosing your country, additional fields will appear to choose your State and enter your specific tax rate and whether Shipping is Not Taxable, Partially Taxable or Fully Taxable. In some states, the shipping cost is not taxable, but any handling fees are. Be sure to check the details for your location.
d. Click on ‘Save’ to save your settings. A message will appear notifying you the settings have been saved. A new field will appear to enter another tax rate. You may enter additional tax rate information as necessary. This is typically for businesses which hold offices in multiple states. Save your settings each time you add another tax rate. When done, click on ‘Close’ or the ‘X’ button to close the window. You will now see your Tax Rates listed under the Payment and Tax Details section:
- Choose the Start Date/Time and Duration of your Auction:
a. Clicking in the Date field will bring up a calendar to choose the date, clicking in the Time field will bring up a number pad that includes AM and PM buttons
b. You can leave the ‘Start Date/Time’ fields blank and your Listing will start immediately after you click on ‘Create Listing’.
c. For ‘Duration’ you may choose 3, 5, 7, 10, 14, 30 days or ‘Good ‘Til Canceled’. We recommend at least 14 days to get maximum exposure a Fixed Price items.

- Once you are complete, review your listing, then click on ‘Create Listing’ to list your Fixed Price item.
a. Forgot something, or need to take some more photos? You can also click on ‘Save Draft’ and the Listing Draft will appear in your Account to complete later.

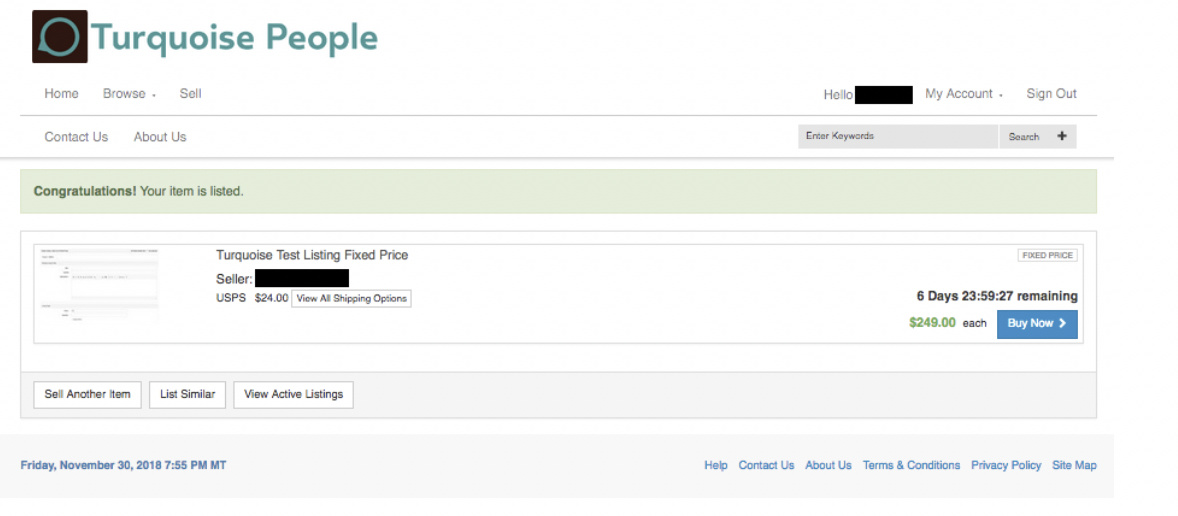
- After your listing is created you will be directed to a page which provides a summary of your listing.
a. For scheduled listings, you can see how long until the listing will launch, and also Preview the listing. You may also choose to ‘Sell Another Item’, ‘List Similar’ or ‘View Active Listings’.
b. For listings that are listed immediately, you will see a notification that your Listing has been created and is live. You will also receive an email notifying you that your listing was successful. Click on the ‘Buy Now’ button to view your listing. You may also choose to ‘Sell Another Item’, ‘List Similar’ or ‘View Active Listings’.